Guide to Applied Ankimaphycs
Disclaimer
¡This article is currently a work in progress! I just wanted to get the majority of what I want to say out of the way so that it may help someone already. I am not yet satisfied with it, and I am sorry for the rambling and it being very rough around the edges. I currently don't have too much time, so any further progress will be slow.
If there is anything to take with you, maybe start with my current workflow and see if there is anything interesting for you. If this is of interest to you, my far less polished takes on stuff and anecdotes in previous section may also be interesting.
Note that most of this is just anecdotes and my personal opinions! I tried to add references where I know them, finding them is part of the work I mentioned that I intend to do, but mostly you need to think about this yourself, try out whether it sounds good and sound and do small scale experiments (before scaling these up). Also read other things, ask in the Anki subreddit, but most of all think and try things out for yourself. I tried to write this article to save you time and I hope I can be useful, but always think for yourself. By the way, I could cite the [20 rules of formatting knowledge][20rules** a lot in this article, I did this only occasionally because it would get overwhelming otherwise and because I am lazy.
Update: (2020.02.02) I have added a shared deck https://ankiweb.net/shared/info/403056739 to more easily show off my current card design. Currently I'm using css grids instead of html tables, which look promising. Furthermore here is a link https://sofiabelen.github.io/selfstudy/Russian-education-maddness.html to another complementary blog I found.
Conventions
- maphy = math and physics
- natural repetition = repetition that occurs by chance in your daily life and is not planned or scheduled by you (aside from you expecting such repetition to occur in general in your environment, but where you don't schedule repetitions for specific items)
Tips on Getting Around the Page
I sometimes have internal links to different sections of this article, if you click on them you can use the 'back' button you use to get to the previous page, to get to your last reading position.
This works, because to jump to the linked section, your browser accesses the same page under a new URL, which is old-url#section-heading. Thus going back in your history you land on the old-url page, for which your browser usually saves your reading position. You can have different reading positions for old-url and old-url#section-heading since for your browser they are, if not different pages, then different URLs.
Furthermore every headline is a link back to the table of contents, which should allow you to get around the page quickly.
What This Is About
In this article I want to share my experiences in using Anki for math and physics (maphy), as well as how I currently use Anki for these subjects and why after a long period of experimentation and experiences learning for tests and in general I arrived at this method, or rather why I think this is a promising way.
Cheesy Intro
Remember the proofs in math and physics you slept through [*], which you dread with abandon? With this method we will do nothing (almost nothing but proofs) and you will get to love proofs you will be delighted every time you find a nice proof you can add to your Anki collection. And in the end we will [**] fluently proof a lot out of our hand, ad hoc, know all the definitions and formulas and will be chunking our way to intelligence.
[*]\: Assuming you are a regular physics student swamped with math, physics, exphy (experimental physics) exercise sheets, lab reports and a 10h+ side job, as well as trying to maintain a semblance of a social life. [**]\: Since I am just starting on my own journey with this I include myself. Thus you need to convince yourself whether this method sounds good to you, I can't guarantee anything yet, but preliminary testing is resoundingly positive.
Read These Articles First
Read these first: Comic Guide to spaced repetition Twenty rules of formulating knowledge Two articles by Dr. Michael Nielsen on spaced repetition in general and in relation to mathematics.
I highly recommend (since I can’t make you) read Dr. Piotr Woźniak’s Twenty Rules Of Formulating Knowledge first, since a lot of what I say here will just be a reformulation of what’s already there. Even as I write this and reread the article I notice, that improvements that I have come upon recently have already been formulated there and I must have simply forgotten them or had not realized them in the past. So rereading the article can’t hurt, especially so that you don’t waste time recovering things the hard/wasteful way.
Table of Contents
- Learn First Review Later
- How I Managed to Screw This Up
- Give Your Memory Some Credit
- Choose Your Own Battles Wisely
- Specialization and Natural Reviewing
- Priority of Learning in Maphy vs Languages
- Muscle Memory
- Well-Definedness
- Relation to Sentence Mining
- Learning Cards Themselves
- Early Planning Spares a Lot of Work Later On
- Harder Is Not Always Better
- Adjust Your Learning Steps
- Increasing the Graduating Interval
- Adjust the Failure Settings
- Spacing out Your Reviews
- My Maphy Settings
- Rescheduling Cards
- The Efficiency of Proofs
- Why I Still Use Formulae and Definition's Cards
- Thinking About Additional Information of Definitions
- Card Design
- Benefits of a Fixed Structure
- Thinking About the Steps of Your Proofs
- Showing Steps
- Tip on Formatting Proofs in Anki
- Adding Sources to Your Card
- My Current Workflow
- Card Designs
- Writing the Cards
Before I come to the method I want to touch upon some things important for learning with Anki in general.
Learn First Review Later
This is obvious and it is also Rule #1 in the 20 rules but you'd be surprised how I still managed to screw this up. So please always remember this, otherwise you might remember some formulae and might even pass the tests, etc., but disregarding everything else, it is also very inefficient.
How I Managed to Screw This Up
Give Your Memory Some Credit
The positive news now is that learning is far more important than reviewing and we can give our memory some credit.
Disregarding everything else, or assuming the worst case scenario, if you have learned and really understood something, you can always rely on relearning being much faster [*] than the initial learning. Often you can just take a cheat sheet and have a pretty good understanding again.
[*]\: I assume this to be mostly common knowledge, or rather coming from hearsay and personal experiences, thus take this with a grain of salt. However it seems to be true, as cursory utilization of search engines suggests. I think this is also part of Ebbinghaus's initial findings, which I was reminded by this reddit comment here.
You can also combine this cheat sheet approach with looking up formulae to calculate something. Thus you don't need to remember everything. Just learn it once and have your cheat sheets ready. This is similar to how often, it is only required to know the formulae, have a rough understanding of where they come from and a good understanding of how to use them, to pass tests. I assume this is, why universities nowadays mostly only ask this of you. That is, because that is the only thing they can reasonably ask of you, as probably not a lot of courses integrate Anki or teach about spaced repetition systems in general. It is, in a sense efficient since that is mostly what (I expect) later work would require of you, and I assume natural repetition and specialization does the rest.
Choose Your Own Battles Wisely
As Michael Nielsen has discussed here,
I therefore have two rules of thumb. First, if memorizing a fact seems worth 10 minutes of my time in the future, then I do it**. Second, and superseding the first, if a fact seems striking then into Anki it goes, regardless of whether it seems worth 10 minutes of my future time or not. The reason for the exception is that many of the most important things we know are things we're not sure are going to be important, but which our intuitions tell us matter. This doesn't mean we should memorize everything. But it's worth cultivating taste in what to memorize.
** I first saw an analysis along these lines in Gwern Branwen's review of spaced repetition: Gwern Branwen, Spaced-Repetition. His numbers are slightly more optimistic than mine – he arrives at a 5-minute rule of thumb, rather than 10 minutes – but broadly consistent. Branwen's analysis is based, in turn, on an analysis in: Piotr Wozniak, Theoretical aspects of spaced repetition in learning.
you should only add an item if it will save you a certain amount of time later (usually 5 to 10 minutes) or be really interesting in it's own right. I imagine the previous discussion about how you can and should trust your memory is among the points for why you can and should be selective.
Specialization and Natural Reviewing
Learning things, even when not reviewing them is worthwhile, especially combined with the fact, that you do some natural reviewing anyway. Either by circumstance or for example, because the basics are used in more advanced chapters of guides you read, study, etc. This might also be why I remember the basics better than the more advanced stuff.
If you combine this with specialization in your field of study you usually don't need a lot of scheduled reviews in that field, since you will be doing so much work there. That is, you will either be using the things all the time, or your focus on the topic, combined with a lot of time spent in the field, will make natural reviewing of things in the field —which you don't use all the time— far more likely.
Priority of Learning in Maphy vs Languages
With random stuff —where there is no real understanding involved, just plain memorizing— it is important to regularly review. Without this, previous work can be almost completely lost. This is in contrast to math and physics and natural sciences in general. Things you once understood can be more easily reacquired.
Especially since you have done the heavy lifting of understanding already, you don't really need to do it again, maybe just remember a trick here or there or some key concepts or definition. Anki can still be tremendously helpful here but using Anki to remember stuff without first understanding is really really bad. That being said, it kind of works. At least for exams, cramming etc., but you will fall flat on your face when you actually have to do something with it.
Additionally, regarding maphy subjects, if you do not learn first you are fated to learn everything like unrelated vocab, without mnemonics, i. e. as inefficient as possible. This is because you then can not make use of the logic and relations inherent to maphy, which would serve as natural mnemonics, or rather you don't need mnemonics when you have understanding, since understanding trumps mnemonics.
Though as mentioned above, the degree of efficiency for brute forcing language vocabulary and things involving understanding are quite different. I have forgotten almost all of the vocabulary which I learned at some point but then didn't have the time to review for half a year or so and which I now have to relearn. A I can still recall few percentile of those vocabulary items, while I remember the majority only vaguely. That is, I just remember one facet or the other, or vaguely know the direction of the meaning. Half the time though, I'm completely off. So the things which remain are more a sense of familiarity and some remnants of memory, but no comparison to learning stuff involving understanding or even more amazing muscle memory.
Thus with maphy understanding first is important but even without review you lose less without reviewing. With languages, understanding is no problem [*] and you can go directly to memorizing. However without spaced repetition from an early stage, you forget the information far more quickly and need a higher percentage of initial learning time to reacquire the knowledge.
[*]\: Except for example with unfamiliar grammar rules which follow the maphy pattern, since here understanding is far more important than remembering the particles or the exact pattern involved.
Muscle Memory
I recently unpacked my guitar and bass guitar again after not having played guitar for more than 6 years and bass guitar for more than 4 years. After about 30 to 60 minutes (for each instrument) of figuring out a few old songs, I could play all of them from sight almost as if no time had gone by. This of course is probably heavily dependent on how well and how long you had played the instrument previously.
Another thing to note here, is that initially I had completely forgotten how each note was played, I remembered one or two but had to figure each one out from there. After that I could let muscle memory take over and almost play as I used to. Given a few more days, this awkwardness would probably rapidly disappear and tend towards to my old abilities.
Now in math and physics there is also a lot of muscle memory involved. You probably will have a hard time forgetting how to rearrange equations and after looking up old algorithms will be quickly familiar on how to implement them again. From my observation the lone facts tend to be far more fragile, and I think this is what it comes back to. The greater connectivity of muscle memory stemming from the connectivity inherent to procedural memory as well as the fact, that you probably repeated your muscle memory a lot with spacing in between, will have made these memories stronger. That is more time resilient, through repeated retrieval and in the case of procedures through interconnection.
Well-Definedness
I choose this term in analogy to the concept of a well defined map. Thus I use this term to describe the extend to which it is clear, what is expected of you i. e. what the expected answer is.
Be aware, that well-definedness with Anki cards is less a proposition (in the logical sense) and more of a continuum. Meaning that a card has no exact answer, since we are working here with the enormous plasticity of your brain and not a rigid system where you can specify a answer in a few bits of information. Especially, since every brain is different. Thus a card can mean a lot of different things to a lot of different people, which is a boon as well as a problem.
Relation to Sentence Mining
Especially with cards you make yourself, and where no conflict is expected, you can use this for any topic to reduce the time spent on card creation. This has also been used in language learning for sentence mining with great effect.
I personally had problems remembering exactly which word fits into which cloze with my sentences (after I had have a few), but that probably is just my limited grasp on the language, as well as using bad examples. In general I found you can alleviate this problem by using cloze-hints (i. e. {{c#::Vocab::Hint}} in Anki) rather well. As well as by limiting yourself to certain domain of few words, i. e. those clozes where only a few words would fit, generally meaning for specific terminology and not general or grammatical expressions. The latter are also generally well learned through massive comprehensible input and then are ingrained in so many example sentences, that you don't need dedicated flashcards, at least not those sentence mining ones.
I can imagine, that target-language → native language cards work well, for those that don't have a bazillion answers, but generally it's not worth the effort of trying to make those. You usually should just watch, read, hear, write a lot of things, and if all else fails (your memory I mean) you can always just look it up, since the grammatical particles or rules should be a tiny amount compared to the vocabulary a student is expected to learn [*]. Especially since you learned it previously and thus know (at least vaguely) what you need to look up. Otherwise you already failed in the 1st rule of formulating knowledge.
[*]\: Please give me an exception to this, it would delight me, and I don't mean ones where the combination of a few grammatical rules can lead to a vast amount of grammatical possibilities, e. g. those languages with a million possibly conjugations.
Learning Cards Themselves
The flip side to this directly ties into the discussion of making cards yourself versus using premade decks. This discussion is essentially usually a discussion on whether it is more efficient to learn the cards of others rather than using your own self made cards which come with your own memories and are usually custom made to your own brain. This discussion is often subject dependent, since with some subjects this is easier than with others.
This learning the cards effect is not just confined to learning cards of premade decks, but can happen with your own cards as well. Maybe not directly after you've made them, but after a while and once you have made a lot of other cards, it becomes harder and harder to remember what was asked on a certain card and you spent time remembering what was asked on this card. After a while you have thus learned what is the expected answer for this card as well as the answer. This is an especially frustrating process, since you are remembering senseless information (or information that seems senseless to you and which in this case it certainly is) which usually lowers motivation and makes learning in general at that time, not just learning cards, harder. Thus whenever I speak of learning cards in the future, this is what I mean.
Aside from simply making the cards harder, I expect this learning of cards themselves makes long term retention worse. Because, maybe you are good at remembering the actual answer to a card, but not so good at remembering what is asked, i. e. I would expect the retention efficiency of remembering the card and the answer to be different, and the retention efficiency of remembering what is asked being worse than for the answer. The reason I expect the retention efficiency for learning the card to be worse is because it is boring, you know it is useless stuff you are remembering, that is your motivation is low to remember this, and it is arbitrary, at least far more so than the answer with math and physics related subjects usually is.
This stems from my personal experience, where I think, if I'm not misremembering, that not knowing what a card wants, is often/usually what caused me to fail on cards after 3 months or so of not seeing them (but especially, I think, after 5 to 6 months or so).
Early Planning Spares a Lot of Work Later On
This also means, that, in general, it is okay to keep old, badly made cards in your deck, since after you have learned them, it is generally not worth spending the time reworking them, except maybe in some extreme cases and those where you have not really learned the cards yet.
I used this aspect frequently in my own experimentation. It being my rational for experimenting on a small scale [*]. I would always tell myself to experiment, and if something didn't work, you would not have wasted your time, since you can just keep on using them, and that they would then serve the double function of reminding me of bad designs, as well as pushing me towards working on better designs. I can attest that this rational works, but it nevertheless is still quite frustrating, thus I have culled a lot of old bad cards, and only left a few, which I already learned really well, or which weren't as bad as the rest of them. This in turn freed up a lot more review time I could then spend on better endeavors. Thus it is a double edged sword, but I think the point still stands.
[*]\: and on a larger scale, when I couldn't help myself, usually resulting in a lot of bad cards I now had to live with or had cull i. e. to suspend and never see again.
I noticed that the effect from the lack of well-definedness in your deck becomes more and more pronounced the larger your deck is (which makes sense, you don't really need experience for this), and the more cards interfere with each other. Thus you won't notice the extend of this problem in the beginning before it comes back to haunt you. But reworking cards takes a tremendous amount of time, with questionable return on investment [*]. Thus I hope you think about this before and while making cards, so that you can spare yourself the brunt of this effect, since, I expect, you will always have to deal with this problem.
[*]\: I mean, the return is generally good, just not the efficiency, since it usually takes me a lot of time, comparable to the time of making the card in the first place, to rework a card.
In general I think the pareto principle or 80/20 rule applies here as well, meaning that 20% of the work already yields 80% percent of the result but getting those last 20% requires 80% of the work. The work for the last few percent probably tends more towards infinity than towards a finite amount, but you get the point. This also reminds me of the retention efficiency and how often you need to review things (both models break down (in my humble opinion), once you try to get 100%).
Harder Is Not Always Better
As my last point I want to give a personal anecdote but which I think illustrates a common problem.
I noticed that I often made cards intentionally a lot harder by removing context information, which would help me a little bit but would also help tremendously to increase the well-definedness of the cards. Thus without this context information, it was a lot harder to remember what the card asks, although it only removed a few clues to help me with the answer. Until I noticed, I was not aware, that the majority of the added difficulty came from removing context clues, and not from removing hints. I. e. the majority of the difficulty came from also needing to learn the card itself and not from having a hard time remembering the answer. I realized, that for me this was one of those cases, where choosing the most difficult path is not always the most efficient or best path for what you envision, since, again, most of the added difficulty comes from thinks you don't care about.
Now I'm of the opinion that leaving these context clues in there, is less harmful than the time or annoyance spend on memorizing the expected answer to a card. Especially since I feel that these context clues don't matter. If you don't know the information anyway, you still won't be able to answer the question — even if you know what exactly is expected and even know parts of the answer already because of those context clues — since you still need to be able to put it together and know it in the first place.
Also in real life, you usually get a lot of these hints already, or can spend a little bit of time to get some clues, since especially with things you don't need to get right on the first try, you can experiment a bit and get feedback. This I think is also possible with formulas, but is especially the case for when I tried to use Anki cards to learn keyboard shortcuts for my different operating systems.
In summary I think, that paying attention to the well definedness of your cards should thus result in less annoyance when reviewing, less reviewing time, less mental strain and less unnecessary reviewing or learning.
Adjust Your Learning Steps
I will discuss my tips and strategies I discovered to easily make well defined cards in the next section. In this section I want to discuss the importance of adjusting your learning steps. This is especially useful for maphy subjects but not exclusively. I also went and adjusted my steps on my Japanese sentence mining and vocab cards to greatly reduce my daily reviewing time, making my daily review schedule far more amenable.
I will recommend having a look at the corresponding sections in the Anki manual (start here), since for this it is best to have an understanding of what happens and being able to adjust these settings yourself, since these depend heavily on the subject, your card design, and yourself in general, as well as how you review your cards, how much time you allow yourself for recall, etc. Nevertheless if you are just starting with Anki or want to put this off for later, you can simply copy the settings I will discuss below and start from there.
Additionally I can recommend this video from Anking which does a good job explaining everything and giving starting recommendations [*]. It wasn't until recently where I had Anki cards I did for a while, that I had the idea to maybe have a look at these settings. I was familiar with the idea though from an article I read a while ago but didn't have a lot of success with at that time (, which was why I had abandoned it until now).
[*]:
Most of it came to late for me, except for the 20% failure setting I took from there. I also have started to make an effort and force myself to watch other videos on Anki to scan them for useful tips, so thanks for that (making me watch these videos, but also reminding me of another source of information). (Videos are not really searchable so I guess that, and that there weren't a lot of videos on the subject until a while ago, was probably why I forgot about this until now.)Increasing the Graduating Interval
Adjusting your learning steps from the default settings can be especially relevant for maphy subjects, since here you do not usually learn arbitrary knowledge like vocabulary in languages [*] but things with derivations and which are logical or can be understood intuitively or linked to real life experiences.
[*]\: Languages, where you don't have any connection, if you learn related languages you can also benefit greatly from increasing the learning steps.
Thus you want your cards to start with a larger interval, since you are supposed to really understand what you put into a card for review first. You should be able to recall it easily after a few days, depending on the thing even after two weeks or more. From personal experience I know, that I could remember things, that I really understood well and dissected and looked at from a lot of angles, even after two weeks. Meaning I would be able to answer the cards I would do for that subject. I can attest to this from a few more recent experiences. As I described in the learn first review later section, I had to frequently correct my ankifying behavior. Thus in the last few weeks I wrote down cards in my notebook, which I then made into cards and then after a few days reviewed. I could answer almost all of those cards, setting them to be reviewed 20 days later [*] and the other ones, where I had a few tiny errors I set to be reviewed in 5 days.
[*]\: I just like to take four times the normal graduating interval, simply because the ratio in the standard settings was also 1 : 4 and it has worked well for me.
Furthermore by increasing the graduating interval for new cards you can skip one whole review cycle, if you where to start from the standard settings. Because with standard settings your graduating interval would be 1 day for GOOD, then 3 days and then 5 days if you chose GOOD on both occasions. Thus if your graduating interval is 5 days from the start, you skip one reviewing of that card. If you do this for all new cards you can lessen your review load from new cards immensely, since these account for a majority of your reviews with the standard settings. At least for a while when you are starting with your deck, as well as as long as you do not go crazy by adding to many new cards in a short time span resulting in an ever increasing daily review count until you crash.
Adjust the Failure Settings
I personally first started to adjust only my graduating interval settings and only then noticed, that I should probably adjust my failure settings as well. Since what applies for your new cards applies to your failures as well. You don't need your failures in maphy to start with the standard failure graduating interval of one day, you want it to be at least similar to your new cards, normally even higher since you already reviewed this card for a while.
To adjust this you can set the minimum interval for a failure in you deck settings, I like this minimum interval to be like my intervals for new cards, which is why it is 5 days in my settings, which has worked well for me for intervals in the range of one month.
Especially for cards you had on a long interval e. g. > 3 months you do not want to start again with that card from 1 day or even 5 days, filling up your review queue with unnecessary reviews [*]. I thus recommend to set your new interval after failure interval to something other than 0%. I have found that 20% [**] or 25% percent works well for me. With 20% you can notice a difference once the interval is higher than five plus one (i. e. 6) times your minimum interval, thus with my settings this would be 30 days. Thus for (roughly) every month in your cards state, the failure will get an additional 6 days. For 25% you would notice a difference after (4 + 1) ⋅ minimum interval, that is, after 25 days. The new failure interval would thus gain five days on it's new interval for every 25 days on it's previous interval.
[*]\: Most of the time, most of these failures were because I didn't quite remember one detail right and not because I couldn't remember at all. Thus for me these were quite annoying and I was always tempted to just skip them when I saw them, because I knew I knew them. But just skipping them without reviewing them is dangerous since it is far less effective than active recall, see the Generation Effect.
[**]\: As mentioned in a previous footnote, I took this value from the above mentioned Anking video, and it just worked well for me.
Spacing out Your Reviews
As I talked about in the learn first review later section, unless you have a special need, it is often enough to write down the cards while learning, and then put them in the back of the review queue. With the knowledge that before long they will be in your review queue and thus in your memory for as long as you keep up with your reviews. This knowledge will make the next thing I want to talk about, which is spacing your new cards equally over a certain time period and in conjunction with that setting an upper limit for new cards, far more palatable.
The intent with spacing your cards is to avoid waves of spikes in your review queue which can be seen even after a year or so. Because if, for example, you were to write and learn 50 new cards on the weekend and then do no new cards for the next few weeks, you would get a wave of higher daily review counts which slowly flattens out or dissipates. This is due to you failing some of them and marking others as easy, distributing them more evenly in your review queue.
Spacing out the new cards is more a personal preference than a must do, because you could simply power through these spikes or keep an eye on your review count and set an appropriate upper limit on daily review counts. I personally prefer to space out the reviews, but I think there are also additional reasons, which make this stratagem slightly better.
For example, spacing out the burden of new cards and new reviews (alone as well as in conjunction with avoiding review spikes), allows Anki to be more easily integrated as a hobby as well as as a hobby into a daily schedule. Avoiding the review spikes also helps to avoid review fatigue and thus helps in keeping up with your daily reviews.
A possible downside is that maybe you have learned so much and added so many cards, that the cards will appear after you have already forgotten and you have to fail these cards. Thus reducing your retention efficiency and increasing your workload since they would thus come up again earlier, increasing your daily review amount. It is thus important to keep an eye on the backlog of new cards and adjust the amount of daily new cards. But as a rule it is generally better to space the reviews than to have spikes of new cards. You could, for example, make new cards on the weekend and set your daily new cards to be as many as it takes to finish the cards you made that weekend until the next weekend where you plan to add new cards to your queue.
A possible workaround for some problems is identifying key cards and putting them into a special deck you learn alongside your usual deck, combined with willingly putting some cards back, in the knowledge that you will have to relearn them at some point. What I mean with a special deck is for instance a sub-deck of the relevant deck [*] or a filtered deck to adjust the settings. This allows them to come up quicker, or simply puts them higher up (sooner) in the new cards queue.
This is for example especially useful for when you create cards as a tool for learning [**] and keep key cards (e. g. key formulas) to learn for tests. Relearning the cards you put aside when you are not learning as much for that subject or when you do not have time to make new cards, because you are so busy with other things. This for me is often the case with the rhythm of lecture and no-lecture periods of a semester whilst studying at university.
[*]\: With the V2-scheduler a sub-deck becomes an even better option, since while learning the sub-deck are integrated into the parent deck, such that you won't notice the difference (they used to come up in the order of the sub-decks themselves and not shuffled), except for the different settings.
[**]\: What I mean here is the act of creating cards aiding you in learning [***] and not reviewing.
[***]\: For example, the same way making cheat sheets does, although usually more so, since you also, for instance, try to put a step by step summary of a proof as well as a summary of certain concepts on cards, instead of just formulae and definitions.
My Maphy Settings
You can adjust the settings for each deck. To do this on Anki-Desktop choose a deck and then click on Options on the bottom. In Anki-Droid click on the review number on the right hand side of the deck name in your collection menu → tap the three vertical dots in the top right corner and choose options. The following settings and names are tested for Anki v2.1.15.
New cards tab: | Name of Setting | My Example Settings | Comment | | :- | :-: | :- | | Steps (in minutes) | 1 10 | [1] | | Order | … | [*] | | New cards/day | ∈ [0, 10] | [2] | | Graduating interval | 5 | | | Easy interval | 20 | | | Starting Ease | 250 | [**] | | Bury related new cards until the next day | ✔ | [3] |
[1]\: Currently I do not really care for these settings, I just like to do one active recall before I set it to graduate. For this I like the active recall to be pretty soon first and then one after a short while, i. e. 1 hour, making my ideal settings 1 5 60, but 1 10 works as well, since I already learned the material well, and I do not want to have non graduated cards the next day because I forgot to check Anki again that day.
[2]\: I have found that a good upper limit for how many new maphy cards I should do per day —with the standard settings— is ten cards, thus this number can probably be increased. Although it slowly spiraled out of control with ten cards at that time, so ten with the above settings should now be quite comfortable.
[3]\: I think burying related new cards until the next day, is better than seeing related cards quickly after each other, since they can spoil each other, but for my card types this is usually not a problem, since I input them in an order where they don't spoil each other.
Reviews tab: | Name of Setting | My Example Settings | Comment | | :- | :-: | :- | | Maximum reviews/day | 9999 | Try to do all the reviews every day | | Easy bonus | 130 | [**] | | Interval modifier | 100 | [1] | | Maximum interval | 36500 | [2] | | Bury related reviews until the next day | ✔ | [3] |
[1]\: My retention rate is around 90%, if your retention rate deviates from your desired retention rate, you should adjust this. See this section in the manual.
[2]\: Please don't do anything like capping your reviews at something below one year, actually do not cap your maximum interval, to anything below five years, these settings are supposed to be for math and physics not something like medicine, where I could understand that you really want to make sure you are remembering life critical information. If you've done everything right with your card design, there is no need for any cap, at that stage, you know, whether you will remember stuff for that long, or you can manually fine tune the settings, so that you are pretty sure you will remember the information at that point. If all else fails, you can always just look up the information again. Setting a cap to your reviews can increase your reviews dramatically once your review queue reaches that point, and as I said, unless maybe you have life critical information to retain, not trusting in the spacing effect here can lead to vast increases in your review queue (depending on how much you put in there, and what the limit is).
[3]\: See related above, with the exception that here you don't have a determined order in which the cards appear, thus you can't negate not burying related cards with the order in which you added the new cards.
Lapses tab: | Name of Setting | My Example Settings | Comment | | :- | :-: | :- | | Steps (in minutes) | 10 | | | New interval | 20 | | | Minimum interval | 5 | | | Leech threshold | … | [*] | | Leech action | Tag Only | [1] |
[1]\: These leech actions are more relevant for vocabulary cards, where suspending these cards saves you a lot of time and you can always just learn them in a better context, or just pick them up without Anki at some point. Usually with maphy subjects you don't want to find and unsuspend your lovingly and painstakingly created cards. If they are an annoyance you can just suspend them while reviewing or mark them to be reworked.
[*]\: Choose whatever fits you best.
[**]\: I do not, as of yet, like to change the ease settings, since they worked well for me.
The other options under the General tab are not really relevant to maphy cards, which is why I ignore them here.
Rescheduling Cards
The Anki settings you set should be as fitting as possible but you should also not stress to much about it, if it does not work for some cards, since there is also always the option to manually set a new interval for a card, which leaves your card history unchanged and only changes the current state of the card [*] but that should usually not interest you. Manually setting a new interval can be done easily in Anki as well as on Anki-Droid since v2.9.
[\*]\:
> The card’s revision history is not cleared when rescheduling: rescheduling changes the current state of a card, but not its history. If you want to hide the history, you will need to export your notes as a text file, delete the notes, and then import the text file again, creating new notes. Reference: [Anki manual](https://apps.ankiweb.net/docs/manual.html#other-menu-items) (Retrieved: 2019-10-26)Anki-Desktop (tested for Anki v2.1.15):
When reviewing a card press b to see the card you were reviewing in the card browser. Here either right click on the card and choose Reschedule… (either by clicking on it or by pressing r) or by using the keyboard shortcut Ctrl + Alt + R which you can find under the Cards tab. Then choose Place in review queue with interval between: and choose the lower and upper bound of the interval from which the new intervals are randomly chosen for each selected card.
Anki-Droid (tested for Anki-Droid v2.9.1): First open Preferences [*] → Reviewing → under Display find Custom Buttons → find the reschedule option and set it to be anything but deactivated. Then whilst reviewing the option should come up somewhere in the top right or under the menu in the top right.
[*]\: In the main menu, i. e. under the tab that opens when you swipe from the left edge to the right, or while viewing the decks, in the menu when you tap the symbol in the top left.
The Efficiency of Proofs
Proofs are an important part of learning in math and physics, and making cards disassembling a proof to review it efficiently, gives you a further incentive to spent the time really understanding the proof.
That being said, normally one has not enough time for every proof and even if one had, one should probably free the opportunity cost of those cards for other other more important cards. With this opportunity cost I mean the time necessary to create and review these cards, as well as the amount of additional work and space on cards needed to make well defined cards in the presence of other similar cards.
I imagine the importance of proofs depends highly on your point in your journey of learning a subject. That is, what have you learned before, which aspects are already well done on other cards, which things are new to you and which things do you not understand on first glance or which have taken you a while to understand. All these present good opportunities to make cards which review these items as well as the underlying understanding.
Thus on the one hand you should, as a rule of thumb, go through every proof, which does not seem clear. Just for your own understanding. On the other hand you will want to go through every proof to check whether it offers a good opportunity to review and reinforce other theorems, formulae, definitions and concepts.
Leaving everything else aside for the moment, proofs are a great source for well defined cards. They are the maphy equivalent to sentence mining for language learning (in my humble opinion), because they provide the context, in which a select few steps make sense and in which you need to apply the right theorem correctly.
If you combine this ease for making well defined cards with a standardized structure for your proofs, you can cut down on the mental strain of designing your cards immensely.
After you decided on a structure for your proof cards there is usually far less need to think about the best formulation, card design and possible later memory interference. Since you can use one template for all your proofs and you don't need to come up with context clues for your proofs (except for when you want to distinguish different paths of a proof or distinguish similar proofs from each other. Compare the structure section for an estimate of work involved.
Usually you then only need to understand them and write down a version of the proof for your cards which usually aids me in understanding the proof, as well as forces me to understand every minutia of the proof. The latter depends on how you make your cards, which I will discuss later in the section on the structure of cards.
Thus proof cards are far easier to produce than doing just theorems, formulae and definitions, while trying to have similarly high levels of well definedness. At least that was my experience after I spent a considerable amount of time trying to be able to handcraft a passable version of such cards.
It is generally important to know where things come from and at least have a general idea of how theorems come to be. This understanding can often make the alternative of making cards asking for the precise conditions for a theorem obsolete. I used to make a lot of these kinds of cards and they were rather annoying. Mostly because I thought them boring and useless as well as not well defined, since you could give a lot of different conditions and later after I learned new things, I did not know anymore what was asked of me. Depending on the person this can thus be a huge or small time saver. Nonetheless you will have a better grasp on the conditions to apply a certain theorem.
One major factor of the efficiency of proof cards, is the importance of proofs themselves. Without this we could and should be far more selective in our choice of proofs, and we still should be selective, but in general the benefit of learning, reviewing proofs, is worth it, as long as the proof has at least one interesting part. Maybe not for really long proofs though. These should be worth it either because of what is proven, or because they have several interesting tidbits. If it is a painfully annoying construction, you might be better served to just skip them after working through them at least once, so that you may look them up whenever you need it. Remember the discussion in a previous section about learning once and then looking up stuff is a valid technique.
In my experience learning languages, I noticed, that the knowledge you gain/keep from doing word to word translation vocabulary cards does not translate well to actual language proficiency and is usually far harder to keep (lower retention rates and longer reviewing time (per card or in total)).
Similarly in maphy it is far better to have cards that use a context for active recall. Next to facilitating the creation of well defined cards, they also make you motivated and show how the item is relevant. Furthermore they also act as actual examples. In the case of proofs you also know the actual proof, the worth here obviously depends on the proof or theorem itself. Sometimes cards are worth it solely for the proof, other times you could have done the proof the first time easily by yourself. However they give you a good opportunity to ask for an item. For example proofs that are similar to other proofs you have already seen or done a lot of times before, but where the items used are slightly different.
Depending on the level of well-definedness in your previous cards, you can expect less time learning the cards themselves, since the proofs are usually well defined.
You get or retain more of a feeling for moving things in your head, since you don't learn/remember theorems as isolated packages, but already in action.
Working through proofs and understanding them is also an avenue of strengthening your ability to put things together, since it works as an exercise in understanding and usually by using the previously learned material.
Proofs are also very good for reinforcing theorems, since you tend to use a theorem more than once in the proof of another theorem. You therefore review the same theorem or formula in slightly different circumstances. What I especially like about this, is that, in my opinion the reviews of these cards reinforce the understanding of the theorem more than they interfere with each other. What I mean with this is this is the following.
Multiple cards, which are exactly the same, are equivalent to having one card with an equivalent interval setting. This is still true for cards with different front sides and the same answer but where the front side does not introduce a new angle from which to view the card. For example a simple rephrasing of the other cards. However a set of cards with the same answer on the back, where the front side asks the answer from a different angle for each card, will increase your understanding of the answer. How much and in what way obviously depends on the formulation of the front card. These cards however, reinforce each other. Even if you manage to have front sides which don't have any connection to each other, you still strengthen the memory of the back side, increasing the probability of recall for the other cards with the same answer [*].
[*]\: Or at least that is what I assume, I only have a passing understanding of memory to infer this from.
However, if a theorem is used often, even if it is only used in slightly different ways, you will most likely have occasions where two situations are exactly the same. Therefore proof cards lose their efficiency the more proofs you add to your Anki collection. But they are generally never useless, since you still learn the proof. An example would be two poems which have the same line. If you where to learn these poems with overlapping clozes, you would have two cards with the same answer, but the front would be different and you would still learn the position and what comes at which line or position of the respective poems.
Why I Still Use Formulae and Definition's Cards
Now I would argue, that you could substitute a lot of cards for proofs and definitions just by proof cards in which they appear. This would add an additional layer of efficiency to cards per concept. Sometimes I already do this. Often however, I still make them where they are not necessarily needed.
With this I do not include those times, where a proof is not worth it, the end result however is and where the end result is also not used somewhere else. Now that I look back on this construction, this would be a perfect example for a card which should not be made anyway, since there are no connections, it is an isolate. As Michael Nielsen has already argued with his orphan cards, these are not good opportunities for Anki cards.
What this probably shows, is that you can substitute every card asking for a formula or definition by a proof where they are asked. However I still like to make them wherever they can be easily made well defined. If this is not the case you can probably use proofs to make well defined cards for them.
Now I would argue that it can be still be beneficial if not necessary to make these cards. I rely here on the assumption that proof cards usually ask the formulae in a certain circumstance, thus aside from learning what comes next in a proof, you also practice to apply the formulae or definition in a certain circumstance. This I would argue is often different enough from asking the formula or definition out of context in it's abstract form. Thus these two question help to make the other question easier and increase their retention efficiency by adding additional connections. All this without making the other card obsolete, since they are still asking different answers. As well as without asking the same answer in a way without added value by the different way in which it is asked. Since in the case of the proof you learn the proof, and in the case of the definition or formula can be useful to ask it in an abstract way. However in the case of the latter, that is the formulae or definitions, I am not really sure. I probably just like to do it because these cards are often easy to do and because I think more won't hurt, at least in this case. And so far they have not annoyed me, but long term testing has yet to occur.
Thinking About Additional Information of Definitions
Often times definitions have a long history and we only see the end result of a lot of work. Think about what makes a definition good. It needs to make sense, be at best intuitive as well, catch all the edge cases, and do and describe what we want it to do. Or sometimes, just make theorems shorter, etc. One can put this understanding, or at least try to ankify it as well, but in my humble opinion, it usually is not worth it, and it is best to trust that you won‘t forget, it or that the understanding will be “saved“ in all the proofs involving the proofs we do. This comes back to what was discussed in the section on learning first.
I don‘t like doing examples in Anki, because they are hard to do and after a short while they appear to me as meaningless, which leaches me of all my motivation. I would argue in almost all cases, that proofs would catch the understanding, that is proofs would suffice. If they were to not suffice, it would just mean you have to look it up. Then you were to know, that you would need to make an extra card for it, which also means, you only need a few context clues to tell you exactly what you want on a card. I would further argue that those cases, where you do not notice you did not know it, because you forgot a part of the understanding of a definition, are for one not worth it and second, are hard to imagine. Because as a good user of Anki/SRSs‘s and reader of the 20 rules (of formatting knowledge) we would always first thoroughly understand something, before we commit it to cards, or in the case of time constraints, we would always have to come back anyways and we would also lack the right to complain.
Card Design
Benefits of a Fixed Structure
It is beneficial to have fixed structures for your formulae, definition and proofs. This allows them to be quickly produced and the uniform appearance helps to quickly realize what is asked —it helps well definedness. Furthermore it allows a shorter formulation of cards, since position on the card that comes with convention can be used to convey information, for which otherwise a lot of text fluff [*] would be needed.
[*]\: Words like "is", "a", "Defintion:", "Assumptions:", etc.
But I would also recommend to have a note type for both 'front → back' cards, as well as cloze deletion cards, which are open and flexible. I would, for example, imagine a field for the front and one for the back, but without needing to force your card design to fit into a number of fields of your note type, in order to achieve a certain goal. The outcome for these cards should be mostly determined by the structure in the main field.
Having both structured notes that force a certain design, as well as an open note format, should allow the majority of your cards to be made as these structured cards. For the odd card out, where it is hard to fit it into the structure, you can just use a more flexible note type. Since flexible types are supposed to be in the minority their effect due to possible inefficiency should be limited. But they offer efficiency in handling any outliers.
Thinking About the Steps of Your Proofs
In this line of thinking it is beneficial to think about the steps of your proof. Having a kind of standard in which you progress can help your proof cards well-definedness tremendously, since otherwise you do not quite know what comes next. Of course if you think five steps forward and only one step is expected this is not harmful, but it is also not efficient. I think having your proof steps be as atomic as possible is, if not the best way to go about it, a very efficient one. For one, it has the benefits of simplicity as detailed in rule number 4. On the other hand the rules underlying this convention are rather easy to grasp as well. In addition to this it fits very well into the design described in a further section, since it reduces the amount, that needs to fit into the last column of the table described there. For me this atomicity resolves to having one property or theorem used.
Furthermore with this I usually mean that simple rearranging of equations and solving a single equation for a quantity is usually a single action, depending of course on what you are doing and at which level you are at. For example if you are in school and do not feel familiar with solving equations or if you are proving a theorem in abstract algebra and you really want to show how each assumption or property is used. On the other hand if this is not the focus of the proof, and you are quite familiar with this I generally do this in one step. Usually it is clear by the theorem and the number of steps of the proof for the first few steps, or the previous steps for later steps in the proof, how simple rearranging steps are.
Showing Steps
As I have hinted at in the previous section, I highly recommend showing all previous steps in the proof, the number of steps in the whole proof as well as the operator which shows how each cloze relates to each other. For this I can refer to rule 17 (Redundancy does not contradict minimum information principle), which explains it better than I ever could, as well as lots of experience, since of course I had to fail first before understanding what rule 17 implies.
As I have already described previously, knowing the number of steps for each proof and having a rough idea for what is expected with each step, helps tremendously in knowing the atomicity of steps expected. It also increases the well-definedness of the card, without making much of a difference in giving away the answer, see the Harder Is Not Always better section.
For showing the previous steps I noticed, that if you do not show it, the card becomes immensely harder but most of all annoying. This is because for the current step you usually need to have the previous steps in mind, otherwise it is more memorizing than you want and you essentially do not just actively recall only the current step but, if not all, then a lot of the previous steps as well. Thus ruining the simple aspect of the cards described in rule 3 and making the card much harder without any real gain, since it is just inefficient repetition [*].
[*]\: Equal to lowering the ease of your cards by a lot leading to a far higher review burden.
Tip on Formatting Proofs in Anki
I really like the format for equations and proofs you can achieve with various methods of aligning them. However in Anki this is impossible to do with cloze cards, since the cloze needs to surround the whole LaTeX or MathJax field. A nice workaround for this is to use tables. For my proofs or in general for these purposes I use a 4 column table. I use these in general since empty fields do not get in the way and they leave room for easy adjustments later on. I can highly recommend Add Table add-on to quickly add tables.
I personally really like the "pfp - style" table style of this add-on, however for proofs I want each line to be the same thus I remove the blue first line and use the style of the other ones.
To use my style simply go to Tools → Add-ons → click on Add Table → select Config on the right hand side and add this code in between the the other table styles.
"pfp-variant - style": {
    "BODY_STYLING": " align='{0}' style='width: {1}%; padding: 5px; border-bottom: 1px solid #B0B0B0' ",
    "HEAD_STYLING": " align='{0}' style='width: {1}%; padding: 5px; border-bottom: 1px solid #B0B0B0' ",
    "TABLE_STYLING": " style='font-size: 95%; width: 100%; border-collapse: collapse;' "
},
As you can see this is a simple adjustment, which you can also easily do directly for the "pfp -style". You should then be able to select your new style when using the add-on in the editor [*]. Of course you can easily customize and add your own table style this way as well.
[*]\: I did not need to restart Anki for the added styling to be selectable in the editor, but if it does not work for you it might help.
You may notice that anything you enter in the first line of some of these table styles (including the above style) will be bolded, because it is in the table header. You can simply counteract this by selecting the text and toggling the bold option of Anki's editor.
Adding Sources to Your Card
My original workflow with Anki in relation to maphy, was to get my hands on an electronic version of the source document, often a PDF, and use a snipping tool to make screenshots in order to create my cards. Probably as a relict of this, even after my workflow got similar to the one described below, I always added an image of the page I got it from in a hint field at the bottom of the card.
If you have the time to do this, I think this is very helpful if you use it, since it can save you the time to find the section in the book, or, even if you know the page you need to look up, you need to spend the time to look up the page. This also makes it more likely you will look something up if you do not understand it, and not just ignore it and hope you will get it later, i. e. brute force memorize for now. The latter should not be a problem, since as a good student we will always take the time to look something up, but it makes it more amenable.
As I hinted at though, it is a time investment, and depending on your workflow, i. e. if you are working through a book page after page, or need to find different sections from different books, this can range from not much time at card creation to a considerable amount.
Another point I have not mentioned is, that it allows you more flexibility. I often found myself thinking too hard on how I would get a nice image for the sources field or even eschewing books in favor of looking it up online or finding other sources, which usually was one of the biggest time sinks in the whole card creation process.
Thus I personally recommend to also write down, in a quick note, the page number of where you got the information from, when you formulate your Anki cards and then put the book name and the page number instead of the images in the sources page. This is especially helpful, since you can quickly note down the page number, taking no time at all. Compared with specifying all the pages your source field would need to be helpful, often also adding pages before or after, and then adding the images to your card, I think this can save a reasonable amount of time.
In general, I thus think the time saved by eschewing it is worth it, since you can use this time for more learning, reviewing and thus more Anki cards. Especially since I have rarely found myself using these fields, as long as I learned the thing before. For me, having to look up the source field, was often an indicator, that I did not learn enough and that I had yet to understand more first.
As an aside, this also reduces the size of your collection, now only being dictated by the size of the occasional image you can put to good use, the size and amount of your LaTeX images, or by the text size if you use MathJax and in general.
My Current Workflow
Now on to my current card design. Regarding all the LaTeX stuff, I tried to write a guide you can follow to get LaTeX with Anki to work, you can find it here. Furthemore all example images are taken as screenshots on Anki-Droid and the LaTeX images are .svg files generated, as described in the linked article, with LuaTeX.
Card Designs
Example: Maphy-Basic
Fields
Front-Simple-Text
Meta-Errata
Front-Preface
Front-Orientation-Math
Front-Orientation-Physics
Front-Centered
Front-Hint
Back-Simple-Text
Back-Extra
Back-Hint
Back-Full-Text
Back-Image-Sources
Meta-ForSortingField
Meta-Changelog
Front Template
<div class=orientation></div>
{{#Front-Preface}}
    <div class=preface>{{Front-Preface}}</div>
{{/Front-Preface}}
<hr>
{{#Front-Orientation-Math}}
    <div class=orientation-math>{{Front-Orientation-Math}}</div>
{{/Front-Orientation-Math}}
{{#Front-Orientation-Physics}}
    <div class=orientation-physics>{{Front-Orientation-Physics}}</div>
{{/Front-Orientation-Physics}}
<div class=text-preface></div>
{{#Front-Centered}}
    <div class=definition>{{Front-Centered}}</div>
{{/Front-Centered}}
<div class=simple-text>{{Front-Simple-Text}}</div>
{{#Front-Hint}}
        <hr>
        <div class=hint> {{hint:Front-Hint}} </div>
{{/Front-Hint}}
Styling
.card {
 font-family: Sans;
 font-size: 12px;
 text-align: justify;
 color: black;
 background-color: white;
}

.orientation-math {
 font-size: 12px;
 text-align: center;
 color: #DC322F;
 <!--Physics: color: #268BD2; Math: color: #DC322F;-->
}
.orientation-physics {
 font-size: 12px;
 text-align: center;
 color: #268BD2;
}

.preface {
font-family: Serif;
font-size: 12px;
}

.text-preface {
font-family: Serif;
font-size: 12px;
 text-align: Justified;
}

.definition {
font-family: Serif;
font-size: 12px;
 text-align: Center;
}

.hint {
font-family: Serif;
font-size: 12px;
text-align: Center;
}

.simple-text {
font-family: Sans;
font-size: 12px;
}

.answer {
 font-family: Sans;
 font-size: 12px;
}

.theorems {
font-family: Sans;
font-size: 12px;
}

.extra {
font-family: Sans;
font-size: 12px;
}

.full-text {
font-family: Sans;
font-size: 12px;
text-align: Center;
}

.full-text-theorems {
font-family: Sans;
font-size: 12px;
text-align: Center;
}

.sources {
font-family: Serif;
font-size: 12px;
text-align: Center;
}

.changelog {
font-family: Serif;
font-size: 12px;
text-align: Center;
}
Back Template
{{FrontSide}}
<hr id=answer>
<div class=answer> {{Back-Simple-Text}} </div>
{{#Back-Extra}}
    <hr>
    <div class=extra> {{Back-Extra}} </div>
{{/Back-Extra}}
{{#Back-Hint}}
    <hr>
    <div class=hint> {{hint:Back-Hint}} </div>
{{/Back-Hint}}
{{#Back-Full-Text}}
    <hr>
    <div  class=full-text> {{hint:Back-Full-Text}} </div>
{{/Back-Full-Text}}
{{#Meta-ForSortingField}}
<hr>
<div  class=sources> {{hint:Meta-ForSortingField}} </div>
{{/Meta-ForSortingField}}
{{#Back-Image-Sources}}
    <hr>
    <div  class=sources> {{hint:Back-Image-Sources}} </div>
{{/Back-Image-Sources}}
Example Code
Front-Simple-Text:
How can you reduce the resistance of a resistor by 1% by means of a resistor in parallel, how large does the resistor need to be?
[latex]\(\frac 1 R = \frac 1 {R_1} + \frac 1 {R_2}\)[/latex]
[latex]\(R_2 = \_\_\_\_ \; R_1 ⇒ R = 0,99 R_1\)[/latex]
Front-Orientation-Physics:
Elektronics
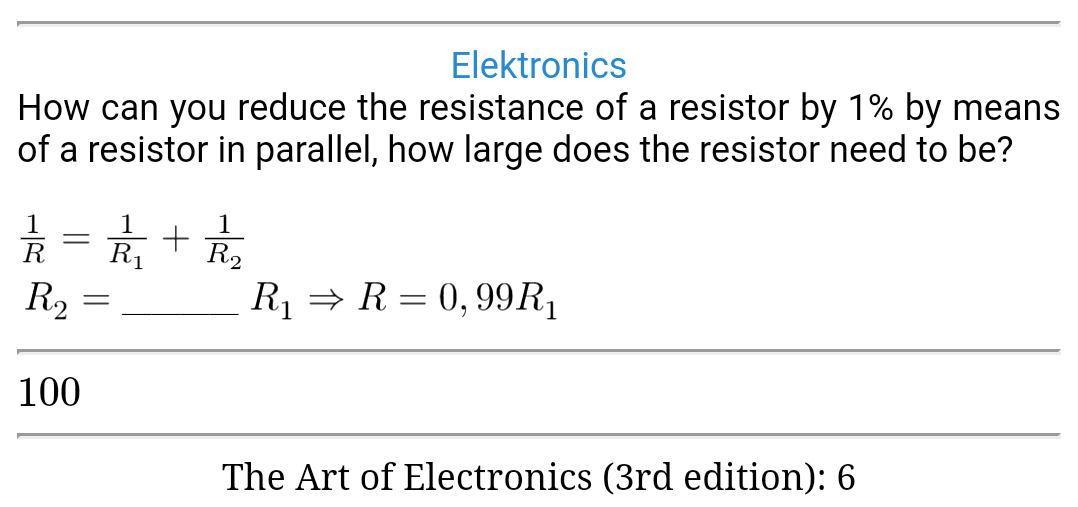
Back-Simple-Text:
\(100\)
Meta-ForSortingField:
The Art of Electronics (3rd edition): 6
Example Images
Front: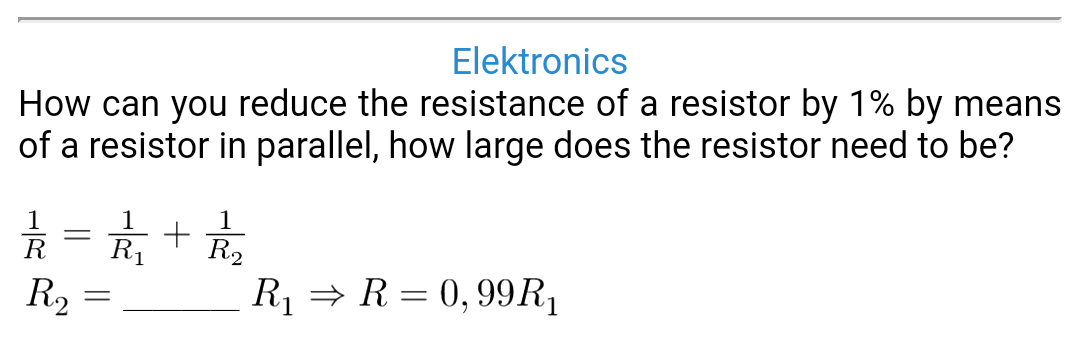 Back:
Back:
Example: Maphy-C-LHS-Op-Name-Text
Fields
Text
Meta-Errata
Orientation-Math
Orientation-Physics
Preface
LHS
Operator
Name
Hint-Front
Extra
Hint
Image-Sources
Meta-ForSortingField
Changelog
Front Template
{{#Orientation-Math}}
    <div class=orientation-math>{{Orientation-Math}}</div>
{{/Orientation-Math}}
{{#Orientation-Physics}}
    <div class=orientation-physics>{{Orientation-Physics}}</div>
{{/Orientation-Physics}}
{{#Preface}}
    <div class=preface>{{Preface}}</div>
    <hr>
{{/Preface}}
<div class=lhs>{{LHS}}</div>
<div class=operator>{{Operator}} {{#Name}}{{Name}}{{/Name}}</div>
<div class=text>{{cloze:Text}}</div>
{{#Hint-Front}}
    <br>
    <hr>
    <div class=hint> {{hint:Hint-Front}} </div>
{{/Hint-Front}}
Styling
.card {
 font-family: Sans;
 font-size: 12px;
 text-align: justify;
 color: #586E75;
 background-color: #FDF6E3;
}

img[src*="latex"] {
  vertical-align: middle;
}

.anki .latex {
  zoom: 120%;
}

.mobile .latex {
  zoom: 120%;
}

hr {
    border:0;
    margin:1;
    width:100%;
    height:2px;
    background:black;  display: block;
}

.orientation-math {
 font-size: 12px;
 text-align: center;
 color: #DC322F;
}
.orientation-physics {
 font-size: 12px;
 text-align: center;
 color: #268BD2;
}

.orientation .latex {
  zoom: 100%;
}
.orientation .mobile .latex {
  zoom: 100%;
}


.preface {
 font-size: 12px;
font-family: Sans;
}

.operator {
font-family: Sans;
}

.hint {
text-align: Center;
}

.text {
font-family: Sans;
}

.extra {
font-family: Sans;
}

.sources {
text-align: Center;
}

.cloze {
font-weight: bold;
color: darkorange;
}

.nightMode .cloze {
color: olive;
}
Back Template
{{#Orientation-Math}}
    <div class=orientation>{{Orientation-Math}}</div>
{{/Orientation-Math}}
{{#Preface}}
    <div class=preface>{{Preface}}</div>
    <hr>
{{/Preface}}
<div class=lhs>{{LHS}}</div>
<div class=operator>{{Operator}} {{#Name}}({{Name}}){{/Name}}</div>
<div class=text>{{cloze:Text}}</div>

{{#Extra}}
<div class=xxtra><br></div>
<div class=xxtra> {{Extra}} </div>
{{/Extra}}

{{#Hint-Front}}
    <hr>
    <div class=hint> {{hint:Hint-Front}} </div>
{{/Hint-Front}}

{{#Hint}}
    <hr>
    <div class=hint> {{hint:Hint}} </div>
{{/Hint}}

{{#Meta-ForSortingField}}
<hr>
<div  class=sources> {{hint:Meta-ForSortingField}} </div>
{{/Meta-ForSortingField}}

{{#Image-Sources}}
<hr>
<div  class=sources> {{hint:Image-Sources}} </div>
{{/Image-Sources}}
Example Code
Text:
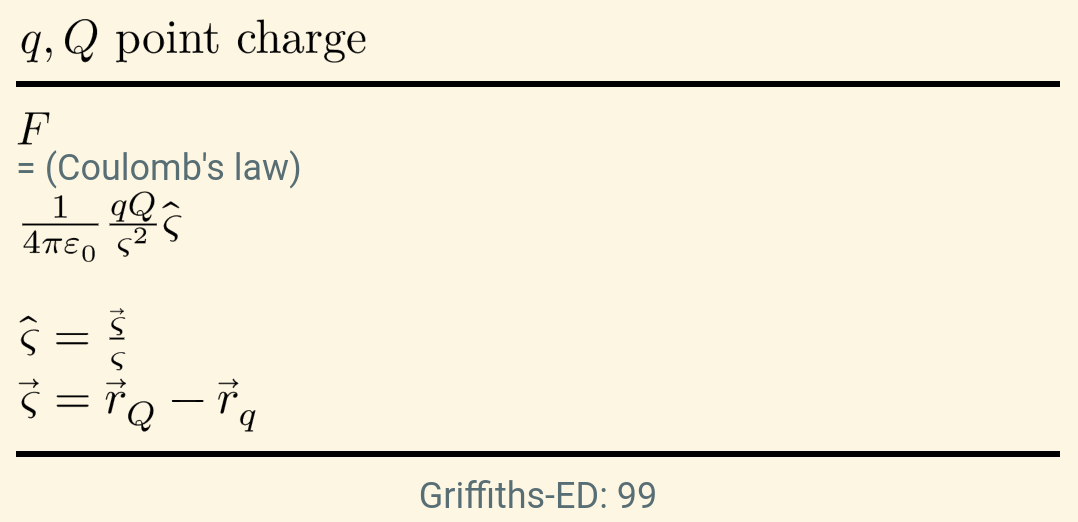
{{c1::[latex]\(\frac 1 {4πε_0} \frac {qQ} {ς^2} \hat ς\)[/latex]}}
Orientation-Physics:
Elektrostatics
Preface:
[latex]\(q, Q\) point charge[/latex]
LHS:
[latex]\(F\)[/latex]
Operator:
=
Name:
Coulomb's law
Extra:
[latex]\(\hat ς = \frac {\vec ς} {ς}\)[/latex]
[latex]\(\vec ς = \vec r_Q - \vec r_q\)[/latex]
Meta-ForSortingField:
Griffiths-ED: 99
Example Images
Front: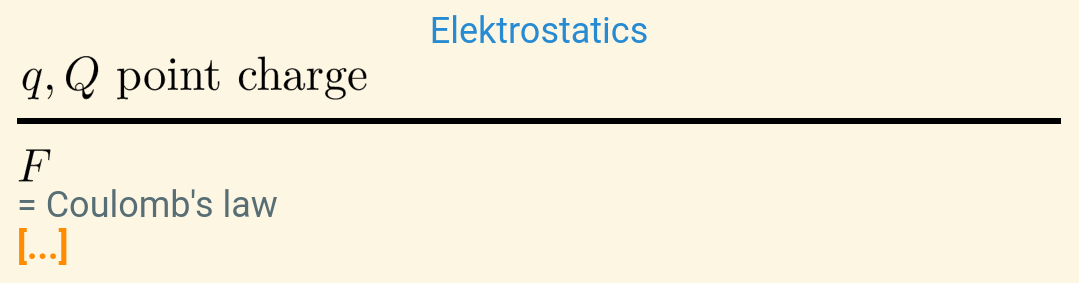 Back:
Back:
Example: Maphy-Proofs-OC
For proof cards I can recommend Glutanimates overlapping cloze cards add-on for Anki. I used to make these overlapping cards manually (with the flexible cloze note type), as I will also demonstrate below, but the add-on saves you time in the card creation process and a lot of time if you ever need to fix something later, since you only need to fix this on one card, and not one multiple cards. Since you almost always will need to at least fix a typo the amount of work saved by the latter is definitely worth it, in my opinion.
Fields
Original
Meta-Errata
Orientation-Math
Orientation-Physics
Preface
LHS
Operator
Name
RHS
Proof-Line
Extra
Meta-ForSortingField
Image-Sources
Changelog
…
Front Template
<div class="front">
{{#Orientation-Math}}
<div class=orientation-math>{{Orientation-Math}}</div>
{{/Orientation-Math}}
{{#Orientation-Physics}}
<div class=orientation-physics>{{Orientation-Physics}}</div>
{{/Orientation-Physics}}
{{#Preface}}
<div class=preface>{{Preface}}</div>
<hr>
{{/Preface}}
{{#LHS}}
<div class=lhs>{{LHS}}</div>
{{/LHS}}
<div class=operator>{{Operator}} {{Name}}</div>
{{#RHS}}
<div class=rhs>{{RHS}}</div>
{{/RHS}}
<hr>
<div class=proof-line><font color="#0008000">Proof</font>: ({{Proof-Line}})</div>
</div>
<!--template
######## CLOZE OVERLAPPER DEFAULT TEMPLATE START ########
version: 1.0.0
-->
<!--
PLEASE DO NOT MODIFY THE DEFAULT TEMPLATE SECTIONS.
Any changes between the 'template' markers will be lost once
the add-on updates its template.
Copyright (C) 2016-2019 Aristotelis P. <https://glutanimate.com/>
The Cloze Overlapper card template is licensed under the CC BY-SA 4.0
license (https://creativecommons.org/licenses/by-sa/4.0/). This only
applies to the card template, not the contents of your notes.
Get Cloze Overlapper for Anki at:
https://ankiweb.net/shared/info/969733775
-->
…
<!--
######## CLOZE OVERLAPPER DEFAULT TEMPLATE END ######## */
template-->
<!-- Add your customizations here: -->
Styling
/*template
######## CLOZE OVERLAPPER DEFAULT TEMPLATE START ########
version: 1.0.0
*/

/*
PLEASE DO NOT MODIFY THE DEFAULT TEMPLATE SECTIONS.
Any changes between the 'template' markers will be lost once
the add-on updates its template.
*/

/* general card style */

…

/*
######## CLOZE OVERLAPPER DEFAULT TEMPLATE END ########
template*/

/* Add your customizations here: */

.card {
  color: #586E75;
  background-color: #FDF6E3;
}

.text {
  font-size: 15px;
  text-align: justify;
}

.preface {
  font-size: 15px;
  text-align: justify;
}

.orientation-math {
 font-size: 12px;
 text-align: center;
 color: #DC322F;
}
.orientation-physics {
 font-size: 12px;
 text-align: center;
 color: #268BD2;
}

.lhs {
  font-size: 15px;
  text-align: justify;
}

.operator {
  font-size: 15px;
  text-align: justify;
}

.rhs {
  font-size: 15px;
  text-align: justify;
}

.proof-line {
  font-size: 15px;
  text-align: justify;
}

.extra-entry{
  font-size: 15px;
  text-align: justified;
}

.sources{
  font-size: 15px;
  text-align: center;
}

.cloze {
  /* regular cloze deletion */
  font-weight: bold;
  color: darkorange;
}

img[src*="latex"] {
  vertical-align: middle;
}


.anki .latex {
  zoom: 100%;
}

.mobile .latex {
  zoom: 100%;
}
Back Template
<div class="back">
{{#Preface}}
<div class=preface>{{Preface}}</div>
<hr>
{{/Preface}}
{{#LHS}}
<div class=lhs>{{LHS}}</div>
{{/LHS}}
<div class=operator>{{Operator}} {{#Name}}{{Name}}{{/Name}}</div>
{{#RHS}}
<div class=rhs>{{RHS}}</div>
{{/RHS}}
<hr>
<div class=proof-line><font color="#0008000">Beweis</font>:: {{Proof-Line}}</div>
</div>
<!--template
######## CLOZE OVERLAPPER DEFAULT TEMPLATE START ########
version: 1.0.0
-->
<!--
PLEASE DO NOT MODIFY THE DEFAULT TEMPLATE SECTIONS.
Any changes between the 'template' markers will be lost once
the add-on updates its template.
-->
…
<div class="extra">
{{#Extra}}
<div class="extra-entry">
<div>{{Extra}}</div>
</div>
{{/Extra}}
{{#Meta-ForSortingField}}
<hr>
<div class=sources> {{hint:Meta-ForSortingField}} </div>
{{/Meta-ForSortingField}}
{{#Image-Sources}}
<br>
<div class="sources">{{hint:Image-Sources}}</div>
{{/Image-Sources}}
</div>
</div>
…
<!--
######## CLOZE OVERLAPPER DEFAULT TEMPLATE END ######## */
template-->
<!-- Add your customizations here: -->
Example Code
Original:
[latex]IA: \(m = 2\) (binomial theorem)[/latex]
[latex]IV: \(\displaystyle (\sum_{j = 1}^m a_j)^k\)\(\;=\;\)\(\displaystyle\sum_{|α| = k} \frac {k!} {α!} a^α\)[/latex]
IS:
[latex]\(\displaystyle(\sum_{j = 1}^{m + 1} a_j)^k\)[/latex]
= [[oc1::[latex]\(\displaystyle(a_1 + \sum_{j = 2}^{m + 1} a_j)^k\)[/latex] ]]
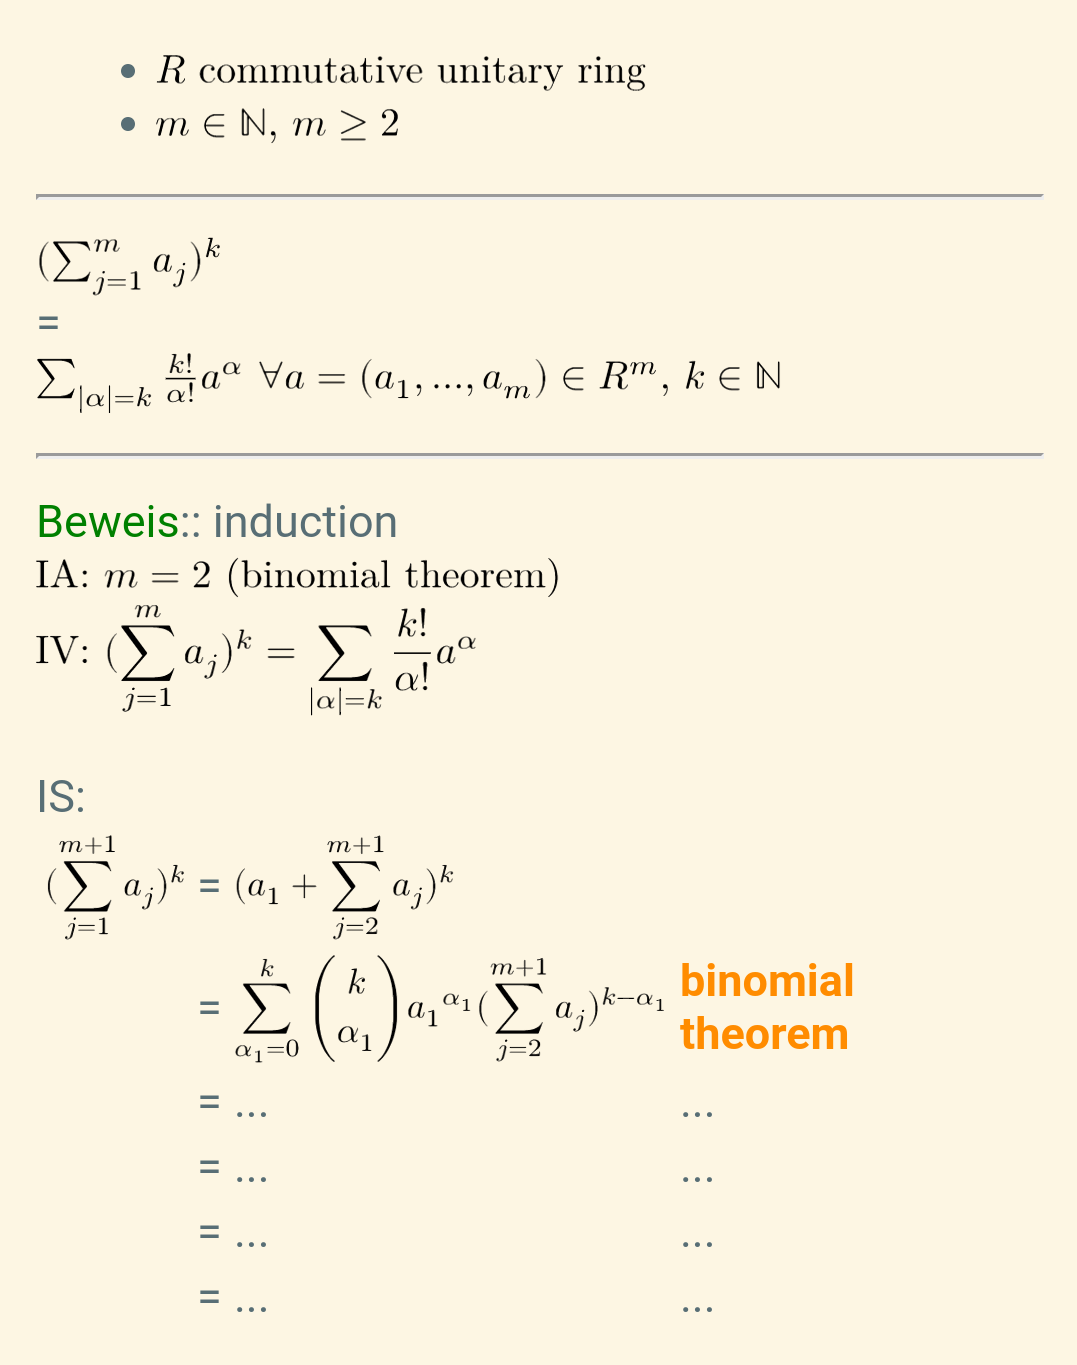
= [[oc2::[latex]\(\displaystyle\sum\limits_{α_1 = 0}^k \binom k {α_1} {a_1}^{α_1} (\sum\limits_{j = 2}^{m + 1} a_j)^{k - α_1}\)[/latex] ]] [[oc2::binomial theorem]]
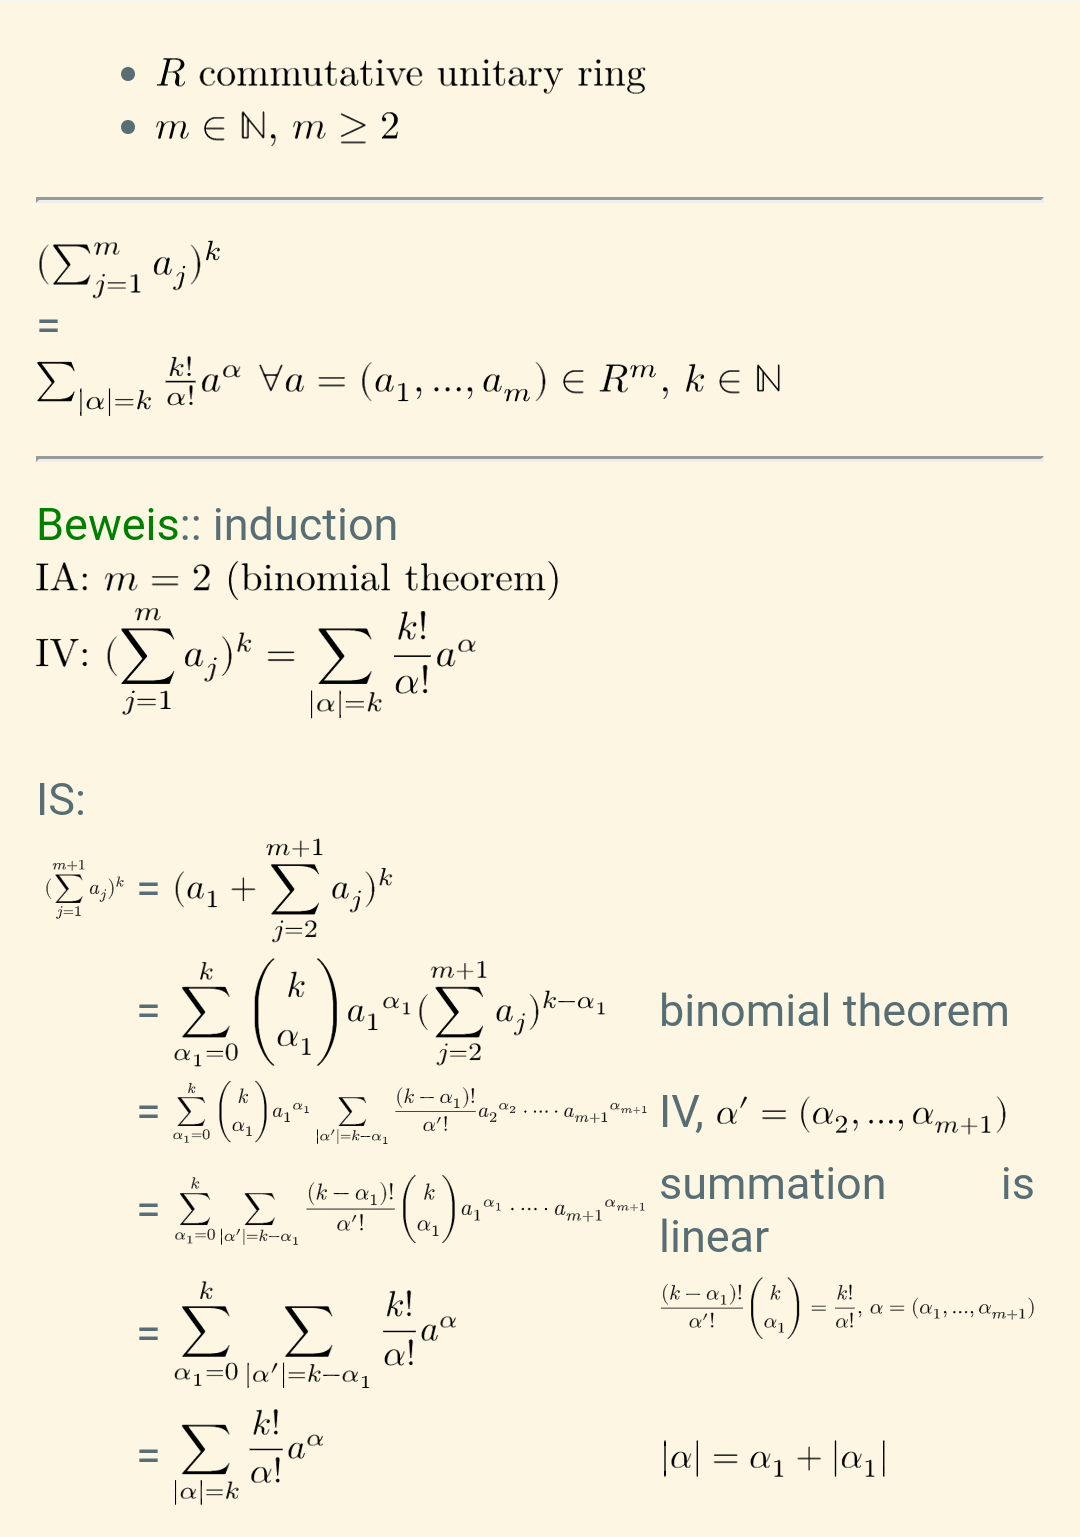
= [[oc3::[latex]\(\displaystyle\sum\limits_{α_1 = 0}^k \binom k {α_1} {a_1}^{α_1} \sum\limits_{\vert α' \vert = k - α_1} \frac {(k - α_1)!} {α'!} {a_2}^{α_2} ⋅ \cdots ⋅ {a_{m + 1} }^{α_{m + 1} }\)[/latex] ]] [[oc3::IV, [latex]\(α' = (α_2, …, α_{m + 1})\)[/latex] ]]
= [[oc4::[latex]\(\displaystyle\sum\limits_{α_1 = 0}^k \sum\limits_{\vert α' \vert = k - α_1} \frac {(k - α_1)!} {α'!} \binom k {α_1} {a_1}^{α_1} ⋅ \cdots ⋅ {a_{m + 1} }^{α_{m + 1} }\)[/latex] ]] [[oc4::summation is linear]]
= [[oc5::[latex]\(\displaystyle\sum\limits_{α_1 = 0}^k \sum\limits_{\vert α' \vert = k - α_1} \frac {k!} {α!} a^α\)[/latex] ]] [[oc5::[latex]\(\displaystyle\frac {(k - α_1)!} {α'!} \binom k {α_1} = \frac {k!} {α!}\), \(α = (α_1, …, α_{m + 1})\)[/latex] ]]
= [[oc6::[latex]\(\displaystyle \sum_{\vert α \vert = k} \frac {k!} {α!} a^α\)[/latex] ]] [[oc6::[latex]\(\vert α \vert = α_1 + \vert α_1 \vert\)[/latex] ]]
Orientation-Math:
Algebra
Preface:
[latex]\(R\) commutative unitary ring[/latex]
[latex]\(m ∈ ℕ\), \(m ≥ 2\)[/latex]
LHS:
[latex]\((\sum_{j = 1}^m a_j)^k\)[/latex]
Operator:
=
RHS:
[latex]\(\sum_{|α| = k} \frac {k!} {α!} a^α\) \(∀ a = (a_1, …, a_m) ∈ R^m\), \(k ∈ ℕ\)[/latex]
Proof-Line:
induction
Example Images
Front: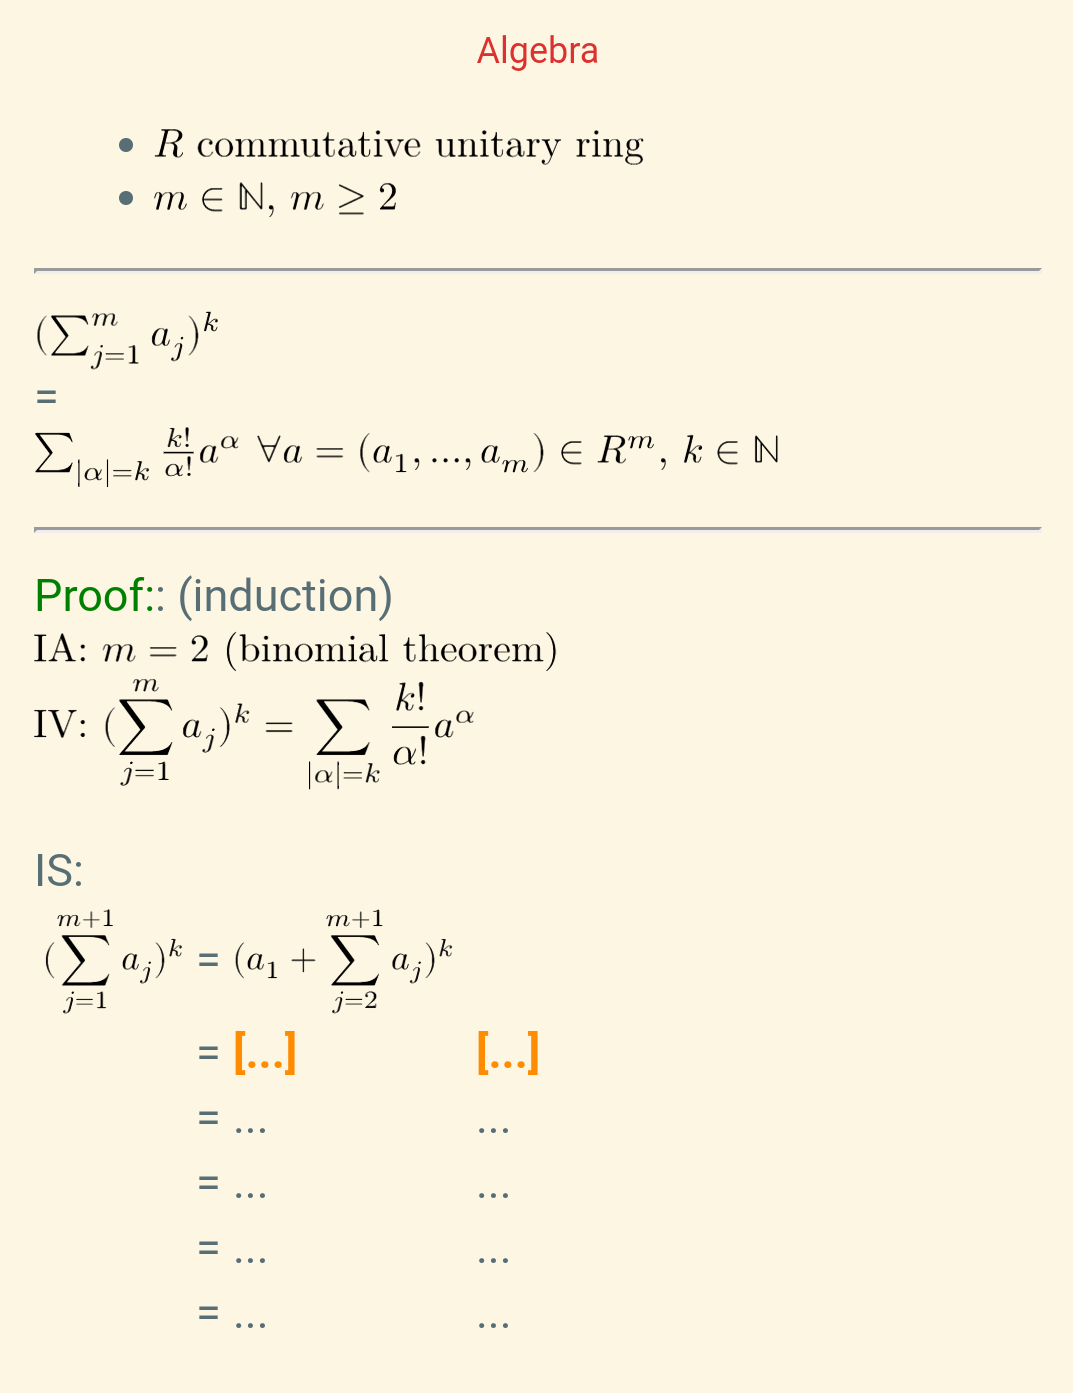 Back:
Back:
 All clozes revealed:
Example: Maphy-Flexible-C
Fields
Text
Meta-Errata
Preface-Orientation
Preface
Text-Orientation
Text-Preface
Text-Centered
Hint-Front-1
Hint-Front-2
Theorems
Extra
Hint-1
Hint-2
Full-Text
Full-Text-Theorems
Meta-ForSortingField
Image-Sources
Changelog
Changelog-Hidden
Front Template
{{#Preface-Orientation}}
<div class=Orientation>{{Preface-Orientation}}</div>
    {{#Preface}}
        <div class=preface>{{Preface}}</div>
    {{/Preface}}
    <hr>
{{/Preface-Orientation}}
{{^Preface-Orientation}}
    {{#Preface}}
        <div class=preface>{{Preface}}</div>
        <hr>
    {{/Preface}}
{{/Preface-Orientation}}

{{#Text-Orientation}}
    <div class=orientation>{{Text-Orientation}}</div>
{{/Text-Orientation}}

{{#Text-Preface}}
    <div class=text-preface>{{Text-Preface}}</div>
    {{^Text-Centered}}
        <br>
    {{/Text-Centered}}
    {{#Text-Centered}}
        <div class=definition>{{Text-Centered}}</div>
    {{/Text-Centered}}
{{/Text-Preface}}
{{^Text-Preface}}
    {{#Text-Centered}}
        <div class=definition>{{Text-Centered}}</div>
    {{/Text-Centered}}
{{/Text-Preface}}
<div class=text>{{cloze:Text}}</div>

{{#Hint-Front-1}}
    {{^Hint-Front-2}}
        <hr>
        <div class=hint> {{hint:Hint-Front-1}} </div>
    {{/Hint-Front-2}}

    {{#Hint-Front-2}}
        <hr>
        <div class=hint> {{hint:Hint-Front-1}} </div>
        <br>
        <div class=hint> {{hint:Hint-Front-2}} </div>
    {{/Hint-Front-2}}
{{/Hint-Front-1}}
{{^Hint-Front-1}}
    {{#Hint-Front-2}}
        <hr>
        <div class=hint> {{hint:Hint-Front-2}} </div>
    {{/Hint-Front-2}}
{{/Hint-Front-1}}
Styling
.card {
 font-family: Cursive;
 font-size: 18px;
 text-align: justify;
 color: black;
 background-color: white;
}

.orientation {
font-family: Serif;
font-size: 18px;
}

.preface {
font-family: Serif;
font-size: 15px;
}

.text-preface {
font-family: Serif;
font-size: 15px;
 text-align: Justified;
}

.definition {
font-family: Serif;
font-size: 18px;
 text-align: Center;
}

.hint {
font-family: Serif;
font-size: 15px;
text-align: Center;
}

.text {
font-family: Cursive;
font-size: 18px;
}

.theorems {
font-family: Cursive;
font-size: 18px;
}

.extra {
font-family: Cursive;
font-size: 18px;
}

.full-text {
font-family: Cursive;
font-size: 18px;
text-align: Center;
}

.full-text-theorems {
font-family: Cursive;
font-size: 18px;
text-align: Center;
}

.sources {
font-family: Serif;
font-size: 15px;
text-align: Center;
}

.changelog {
font-family: Serif;
font-size: 15px;
text-align: Center;
}

.cloze {
font-weight: bold;
color: darkorange;
}
.nightMode .cloze {
color: olive;
}
Back Template
{{#Preface-Orientation}}
<div class=Orientation>{{Preface-Orientation}}</div>
    {{#Preface}}
        <div class=preface>{{Preface}}</div>
    {{/Preface}}
    <hr>
{{/Preface-Orientation}}
{{^Preface-Orientation}}
    {{#Preface}}
        <div class=preface>{{Preface}}</div>
        <hr>
    {{/Preface}}
{{/Preface-Orientation}}

{{#Text-Orientation}}
    <div class=orientation>{{Text-Orientation}}</div>
{{/Text-Orientation}}

{{#Text-Preface}}
    <div class=text-preface>{{Text-Preface}}</div>
    {{^Text-Centered}}
        <br>
    {{/Text-Centered}}
    {{#Text-Centered}}
        <div class=definition>{{Text-Centered}}</div>
    {{/Text-Centered}}
{{/Text-Preface}}
{{^Text-Preface}}
    {{#Text-Centered}}
        <div class=definition>{{Text-Centered}}</div>
    {{/Text-Centered}}
{{/Text-Preface}}
<div class=text>{{cloze:Text}}</div>

{{#Theorems}}
<hr>
<div class=theorems> {{Theorems}} </div>
{{/Theorems}}

{{#Extra}}
<hr>
<div class=extra> {{Extra}} </div>
{{/Extra}}

{{#Hint-Front-1}}
    {{^Hint-Front-2}}
    <hr>
    <div class=hint> {{hint:Hint-Front-1}} </div>
    {{/Hint-Front-2}}

    {{#Hint-Front-2}}
    <hr>
    <div class=hint> {{hint:Hint-Front-1}} </div>
    <br>
    <div class=hint> {{hint:Hint-Front-2}} </div>
    {{/Hint-Front-2}}
{{/Hint-Front-1}}
{{^Hint-Front-1}}
    {{#Hint-Front-2}}
    <hr>
    <div class=hint> {{hint:Hint-Front-2}} </div>
    {{/Hint-Front-2}}
{{/Hint-Front-1}}

{{#Hint-1}}
    {{^Hint-2}}
    <hr>
    <div class=hint> {{hint:Hint-1}} </div>
    {{/Hint-2}}

    {{#Hint-2}}
    <hr>
    <div class=hint> {{hint:Hint-1}} </div>
    <br>
    <div class=hint> {{hint:Hint-2}} </div>
    {{/Hint-2}}
{{/Hint-1}}
{{^Hint-1}}
    {{#Hint-2}}
    <hr>
    <div class=hint> {{hint:Hint-2}} </div>
    {{/Hint-2}}
{{/Hint-1}}

{{#Full-Text}}
<hr>
<div  class=full-text> {{hint:Full-Text}} </div>
{{/Full-Text}}

{{#Full-Text-Theorems}}
<hr>
<div  class=full-text-theorems> {{hint:Full-Text-Theorems}} </div>
{{/Full-Text-Theorems}}

{{#Meta-ForSortingField}}
<hr>
<div  class=sources> {{hint:Meta-ForSortingField}} </div>
{{/Meta-ForSortingField}}

{{#Image-Sources}}
<hr>
<div  class=sources> {{hint:Image-Sources}} </div>
{{/Image-Sources}}

{{#Changelog}}
<hr>
<div class=changelog> {{hint:Changelog}} </div>
{{/Changelog}}
Example Code
Now a rough sketch on how one would replicate the previous example with overlapping clozes without the add-on.[latex]\(\displaystyle(\sum_{j = 1}^{m + 1} a_j)^k\)[/latex] = [latex]\(\displaystyle(a_1 + \sum_{j = 2}^{m + 1} a_j)^k\)[/latex]}}
= …
= …
= …
= …
= …
***
[latex]\(\displaystyle(\sum_{j = 1}^{m + 1} a_j)^k\)[/latex] = [latex]\(\displaystyle(a_1 + \sum_{j = 2}^{m + 1} a_j)^k\)[/latex]
= {{c2::[latex]\(\displaystyle\sum\limits_{α_1 = 0}^k \binom k {α_1} {a_1}^{α_1} (\sum\limits_{j = 2}^{m + 1} a_j)^{k - α_1}\)[/latex]}} {{c2::binomial theorem}}
= …
= …
= …
= …
***
[latex]\(\displaystyle(\sum_{j = 1}^{m + 1} a_j)^k\)[/latex] = [latex]\(\displaystyle(a_1 + \sum_{j = 2}^{m + 1} a_j)^k\)[/latex]
= [latex]\(\displaystyle\sum\limits_{α_1 = 0}^k \binom k {α_1} {a_1}^{α_1} (\sum\limits_{j = 2}^{m + 1} a_j)^{k - α_1}\)[/latex] binomial theorem
= {{c3::[latex]\(\displaystyle\sum\limits_{α_1 = 0}^k \binom k {α_1} {a_1}^{α_1} \sum\limits_{\vert α' \vert = k - α_1} \frac {(k - α_1)!} {α'!} {a_2}^{α_2} ⋅ \cdots ⋅ {a_{m + 1} }^{α_{m + 1} }\)[/latex]}} {{c3::IV, [latex]\(α' = (α_2, …, α_{m + 1})\)[/latex]}}
= …
= …
= …
***
… and so on …
Writing the Cards
I like to sketch my cards on paper while or after I learn something. This gives me a surface to make rough drafts and sketch things in order to help me understand and I can take this everywhere with me. Most of all however I can make cards in bulk before I ever need to type them in Anki, avoiding the frequent distraction this entails as well as frequent switching between learning and typing. Thus I can highly recommend this for maphy subjects.
Furthermore I write down the cards in such a way, that I do not need to think a lot when entering them into Anki later on. This also allows me to quickly type in one card after the other. I use that mental downtime while entering the cards into Anki to listen to podcast etc., it is thus a kind of break for me. Thus taking a bit of extra time to be able to later on just copy whats on the page gives a further efficiency increase. This usually does not entail a lot of extra work, but it means I note the page, the assumptions and whatever else I need to write down. With time I have evolved a few conventions allowing me to leave out some things.
As an aside, for programming I prefer to read a few chapters first before I go through them again on the PC and put them directly into Anki cards. This is simply because I prefer experimenting with formatting code on the PC instead of on paper and in this case it saves me one step of work. But especially for proofs I usually need a long time to think through them thoroughly and I often write cards on different aspects of the proof or need to correct them frequently before I am satisfied and type them in Anki.
Neo-2 Keyboard Layout
Regarding your workflow, typing in the cards, I can recommend the Neo-2 keyboard layout if you use German, English or any language written in the Latin alphabet with diacritics. Especially in it's QWERTY form, since I admire the elegance of ergonomically designed keyboards, but I like the ubiquity that comes with the QWERTY layout. I also find these layouts lose their efficiency when you write a few different languages, especially when you do not want to learn a new layout for every language and have to switch between them.
You can of course, just use this layout as a model to base your own keyboard layout off of, which I initially did as well, but I like the fact, that you can often already find the layout on offer, especially on various Linux distribution, making it ready to use from the get go, without needing to fiddle to get your own keyboard layout to work. Especially since I have yet to exhaust the options of the layout.
Now the reasons, why I am such a huge fan of this layout, are, that a lot of the symbols you use often in programming (which is a pain on German keyboard layouts, not so much on the US-English layout), math and physics (namely greek letters as well as a lot of other symbols) as well as the movement keys are accessible without your fingers leaving the home row, as well as a few more if you also have access to a numeric keypad (numpad). The usage of the Unicode symbols instead of the LaTeX escape sequences makes writing LaTeX markup faster but especially far more readable as you will probably believe, if you compare even just this short code fragment \frac ∂ {∂t} x(t) with this one \frac \partial {\partial t} x(t).
The main advantage of this layout over something like Vim or Emacs with Anki, is that you can directly use it in the editor without any long workarounds. I am a big fan of Vim and Emacs, I currently also use Neo2 with Vim. For Anki however, as far as I know and in my opinion, using a good keyboard layout is currently easier than using workarounds for importing from files.